
Hanging kitchen cabinets is one of those projects that intimidates DIYers at first but becomes rewarding once you break it down. The secret isn’t technique, it’s patience, accurate measurements, and respecting where the studs live in your walls. Most failures happen because installers skip the measuring phase or rush the leveling. Do this right, and your cabinets will hang straight for decades. Do it quick, and you’ll be pulling them down in a year to fix sags and gaps. This guide walks you through the entire process, from layout to final tightening, so your kitchen cabinet installation holds up.
Table of Contents
ToggleTools And Materials You’ll Need
Before you pick up a drill, gather your supplies. Having everything on hand keeps you from mid-project trips to the hardware store.
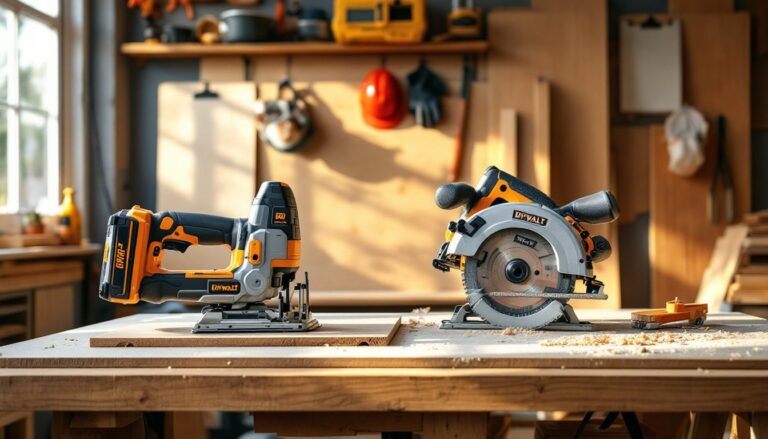
Tools:
- Power drill with a Phillips bit and a ¼” or 5/16″ hex socket (for cabinet mounting screws)
- Stud finder (magnetic or electronic)
- 4-foot level (laser levels work too, but a bubble level is cheaper and just as accurate)
- Tape measure (25-footer minimum)
- Pencil for marking stud locations
- Circular saw or miter saw if you need to cut mounting rails or shims
- Screwdriver set for final adjustments
- Adjustable wrench (optional, for some cabinet hardware)
Materials:
- Cabinet mounting screws: #8 or #10 coarse-thread wood screws, 2.5″ to 3″ long. These bite into studs: drywall anchors alone won’t hold a loaded cabinet.
- Shims: Wood shims, 6″–8″ long, for leveling and spacing. Cheap and essential.
- Wall anchors (optional): Heavy-duty toggle or lag bolts if you can’t hit studs in certain spots, though stud attachment is always preferable.
- Toekick filler and shims for gaps between the cabinet base and wall.
Safety Gear:
- Safety glasses or goggles (you’ll be looking up a lot)
- Work gloves (splinters from shims are annoying)
- Dust mask if cutting shims or drilling into old drywall
Measuring And Marking Cabinet Locations
This step determines success or failure. Spend 20 minutes here and save yourself hours of frustration later.
Start by finding the highest point on your floor along the wall where cabinets will hang. Floors are rarely level. Use your level and mark a horizontal line where the bottom of your upper cabinets will sit (typically 54″ from the floor for standard kitchen layouts). Draw a light pencil line across the entire wall using your level as a straightedge. Next, use your stud finder to locate all studs in that wall. Mark their centers with a pencil on your layout line, they’re usually 16″ or 24″ apart. Take a photo of the marked wall: you’ll reference it as you hang.
Measure the width of your first cabinet, add any filler strips, and mark its left and right edges on your line. Double-check these measurements twice. Cabinets are heavy and won’t tolerate careless math. If your cabinet layout doesn’t hit studs at the mounting locations, you’ll need to install a horizontal mounting rail (a 2×4 bolted into studs) to anchor cabinet screws into solid wood rather than drywall.
Installing Wall Studs And Finding Support
You cannot safely hang cabinets on drywall alone. Cabinet screws must bite into studs or a solid backing system.
If your cabinet locations happen to line up with studs, you’re in luck, proceed to hanging. If not, install a horizontal ledger board or mounting rail. This is a 2×4 or 2×6 bolted directly into studs at your cabinet’s mounting height. Use ¼” lag bolts or ½” through-bolts spaced 16″ apart, all hitting studs. This backing becomes invisible once the cabinet sits in front of it.
Before drilling, double-check stud locations with your finder. Mark at least two studs that will be behind your cabinet run. Professional installers reference guides that show cabinet selection, wall preparation, and the exact installation sequence. Prep work here, getting that mounting rail plumb and secure, prevents wobble and settling later. If you’re in an older home with irregular framing, a laser level helps confirm the rail is truly horizontal before final tightening.
Hanging The First Cabinet Correctly
The first cabinet sets the tone for the entire project. Choose one that spans multiple studs or hits your mounting rail squarely.
Have a helper hold the cabinet in place, aligning it with your marked line and ledger. Before driving screws, slip a shim or spacer under the cabinet at one corner to support its weight and keep it from twisting. Use your level to check that the cabinet’s top surface is dead level. Adjust shims as needed. Once level, drill pilot holes through the cabinet’s mounting rail or mounting bracket into the studs or backing. Pilot holes prevent wood from splitting and let you drive screws straight. Use 2.5″ to 3″ wood screws, typically #8 or #10 gauge. Drive at least two screws per mounting point: most cabinets have holes spaced 32″ apart along their back rail. A mounting system like the one outlined in detailed cabinet installation guides ensures the cabinet is anchored at multiple points.
Drive screws hand-tight first, then double-check level before final tightening. If the cabinet sits crooked, back out the screws partially and adjust shims. Overtightening before confirming level will bow the cabinet face, making doors stick.
Securing Multiple Cabinets In Sequence
Once your first cabinet is solid, add the next one. Butt cabinets together tightly, no daylight between them, then screw them together using 2″ bolts or screws through their face frames. This ties the cabinets into a single structural unit and prevents one from sagging if studs aren’t perfectly aligned.
Repeat the level-and-shim process for each cabinet, checking that the tops are all flush with your first cabinet. If one cabinet sits slightly lower, driven shims under its feet from the front before final screw-in. Check level again after tightening. Gaps between cabinet faces are fixed during final trimming: structural gaps underneath are expensive to fix later. Work left to right or right to left methodically, securing each cabinet to studs before moving to the next.
If you hit a wall outlet or obstacle, measure carefully before cutting holes in the cabinet back. Electrical codes require holes drilled for wiring to be at least 1.25″ from the edge of studs to protect from future fasteners, check your local IRC (International Residential Code) for specifics. Never assume: confirm with your local building department if work requires inspection.
Leveling, Adjusting, And Final Checks
With all cabinets mounted, walk the line one more time. Use your 4-foot level to check that the tops are uniformly level across the entire run. Laser levels shine here, a single line across 12 feet reveals dips faster than bubble levels. Sight along the face frames for any twist. If a cabinet protrudes slightly, loosen its mounting screws by one-quarter turn and tap shims in tighter with a mallet. Retighten. This precision now prevents door racking and hinge wear down the road.
Check that cabinet doors open and close smoothly. Door binding signals that the cabinet case is twisted or not fully supported. Once everything is level and plumb, snug all mounting screws to full tightness. Wipe off shim tips that stick out past the cabinet base with a handsaw or utility knife. Fill any gaps between cabinet and wall with paintable caulk. Install toekick trim, which both fills the gap below cabinets and provides a finished look.
Step back and inspect the whole installation. There should be no visible fasteners, no gaps, and no doors that stick. If you find issues here, address them now, cabinet removal and adjustment is far easier than correcting problems after backsplash and hardware installation.
Conclusion
Hanging kitchen cabinets is methodical work that rewards patience over speed. Measure twice, level constantly, and anchor into studs, those three habits prevent 90% of cabinet failures. If walls are badly damaged or uneven, or if you’re uncertain about stud locations or load-bearing considerations, a licensed contractor is worth the cost. But for straight walls and standard layouts, this is a project that puts a DIYer’s tools to good use. Once those cabinets are secure and level, the rest of your kitchen renovation flows naturally.